Installing a hydrostatic level gauge in a tank with a complex shape can be a challenging yet crucial task for many industries. As a hydrostatic level gauge supplier, I have witnessed firsthand the importance of a proper installation process to ensure accurate and reliable level measurements. In this blog, I will guide you through the steps of installing a hydrostatic level gauge in such tanks, highlighting the key considerations and best practices along the way.
Understanding the Basics of Hydrostatic Level Gauges
Before diving into the installation process, it's essential to understand how hydrostatic level gauges work. A hydrostatic level gauge measures the height of a liquid column based on the pressure exerted by the liquid at a specific depth. The pressure increases linearly with the depth of the liquid, and by measuring this pressure, the gauge can accurately determine the liquid level. This principle makes hydrostatic level gauges suitable for a wide range of applications, including tanks with complex shapes.
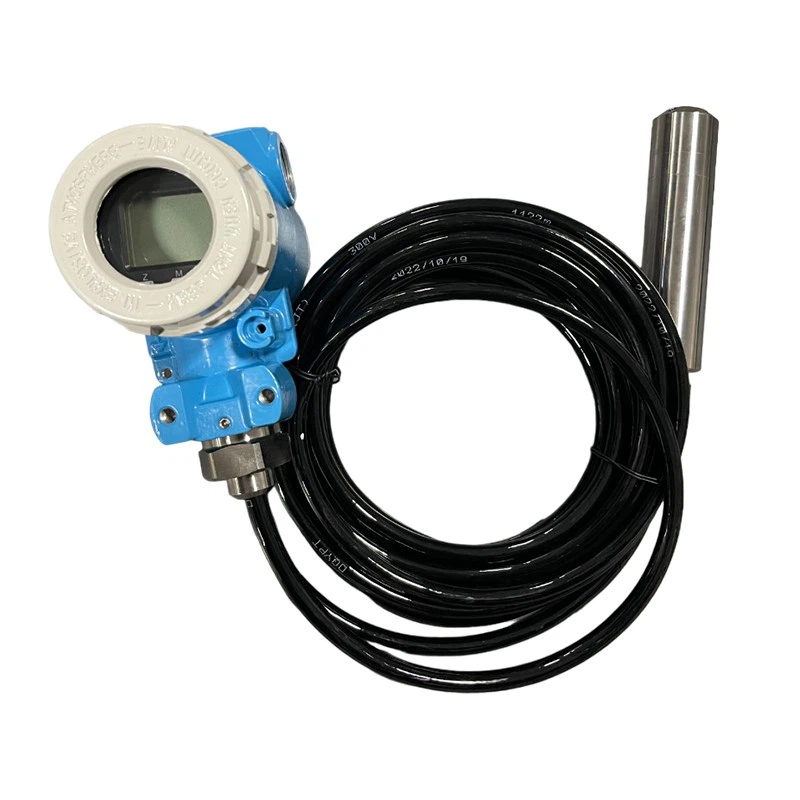
There are different types of hydrostatic level gauges available in the market, each with its own features and advantages. For instance, the Static Pressure Input Liquid Level Gauge is designed to provide accurate level measurements by directly measuring the static pressure of the liquid. On the other hand, the Submersible Liquid Level Sensor is a submersible device that can be placed directly in the liquid, offering a convenient and reliable solution for level measurement. And our Hydrostatic Level Gauge combines the latest technology to ensure high accuracy and long - term stability.
Pre - installation Preparation
Tank Assessment
The first step in installing a hydrostatic level gauge in a complex - shaped tank is to conduct a thorough assessment of the tank. This includes understanding the tank's shape (such as irregular, conical, or multi - chambered), size, material, and the properties of the liquid it contains. For example, if the tank is made of a corrosive - resistant material, the gauge should be compatible with it. Also, the viscosity and density of the liquid can affect the pressure - level relationship and need to be taken into account.
Selecting the Right Location
Choosing the appropriate location for the gauge is critical. In a tank with a complex shape, areas with turbulent flow or where sediment may accumulate should be avoided. The ideal location is a relatively calm area where the liquid level is representative of the overall tank level. For multi - chambered tanks, it may be necessary to install multiple gauges to accurately measure the level in each chamber.
Gather Necessary Tools and Equipment
Before starting the installation, make sure you have all the necessary tools and equipment on hand. This typically includes a wrench for mounting the gauge, a cable for connecting the gauge to the monitoring system, and a calibration device to ensure the accuracy of the gauge.
Installation Process
Mounting the Gauge
The mounting method depends on the type of hydrostatic level gauge. For submersible gauges, carefully lower the gauge into the tank through a pre - drilled hole or a dedicated access port. Make sure the gauge is fully submerged and that the cable is properly secured to prevent it from being damaged or pulled out. For non - submersible gauges, mount them on the side of the tank at the appropriate height. Use a wrench to tighten the mounting bolts securely, but be careful not to overtighten and damage the gauge or the tank.
Connecting the Gauge
Once the gauge is mounted, connect it to the monitoring system. This usually involves running a cable from the gauge to the control panel or data logger. Make sure the connections are tight and that the cable is protected from physical damage and environmental factors. If the gauge has multiple wires, ensure that each wire is connected to the correct terminal.

Calibration
Calibration is a crucial step to ensure the accuracy of the hydrostatic level gauge. Fill the tank with a known volume of liquid and compare the gauge reading with the actual level. Use the calibration device to adjust the gauge settings until the reading matches the actual level. Repeat this process several times at different levels to ensure the gauge is accurate across the entire range of operation.
Post - installation Checks and Maintenance
Leak Checks
After installation, perform a leak check around the mounting point of the gauge. Look for any signs of liquid leakage, which could indicate a problem with the mounting or the seal. If a leak is detected, tighten the mounting bolts further or replace the seal as needed.
Functionality Tests
Conduct a series of functionality tests to ensure the gauge is working properly. This includes monitoring the gauge readings over a period of time and comparing them with visual inspections of the tank level. Check if the gauge responds correctly to changes in the liquid level, such as filling or emptying the tank.
Regular Maintenance
To ensure the long - term performance of the hydrostatic level gauge, regular maintenance is required. This includes cleaning the gauge periodically to remove any debris or sediment that may accumulate on the sensor. Check the cable for any signs of wear or damage and replace it if necessary. Also, perform regular calibration checks to maintain the accuracy of the gauge.
Challenges and Solutions in Complex - shaped Tanks
Irregular Shapes
Tanks with irregular shapes can pose challenges in accurately measuring the liquid level. One solution is to use multiple hydrostatic level gauges strategically placed around the tank. By combining the readings from these gauges, a more accurate picture of the overall liquid level can be obtained. Additionally, advanced software algorithms can be used to analyze the data from multiple gauges and calculate the volume of liquid in the tank more precisely.
Turbulent Flow
Turbulent flow can cause fluctuations in the pressure readings, leading to inaccurate level measurements. To address this issue, install a flow - straightening device near the gauge. This device helps to calm the flow of the liquid and provides a more stable pressure reading.
Temperature Variations
Temperature variations can affect the density of the liquid and, consequently, the pressure - level relationship. To compensate for temperature changes, use a gauge with built - in temperature compensation or install a separate temperature sensor. The temperature data can then be used to adjust the level readings and ensure accuracy.
Conclusion
Installing a hydrostatic level gauge in a tank with a complex shape requires careful planning, proper selection of equipment, and attention to detail during the installation and maintenance process. By following the steps outlined in this blog and considering the challenges specific to complex - shaped tanks, you can ensure accurate and reliable level measurements.
If you are interested in purchasing our high - quality hydrostatic level gauges or need further advice on installation and maintenance, feel free to contact us. We are here to help you with all your level measurement needs.
References
- [Hydrostatic Pressure Measurement Handbook]
- Industry standards on level measurement techniques
- Manufacturer's installation and operation manuals for hydrostatic level gauges