Hey there! As a supplier of ultrasonic flow meters, I'm super stoked to share with you how to install an ultrasonic flow meter on a metal pipe. It might seem a bit daunting at first, but with the right steps and a bit of know - how, you'll have it up and running in no time.
Why Choose an Ultrasonic Flow Meter?
Before we dive into the installation process, let's quickly talk about why ultrasonic flow meters are a great choice. These meters are non - intrusive, which means you don't have to cut into the pipe to install them. This is a huge plus as it saves time, reduces the risk of leaks, and minimizes downtime. They're also highly accurate and can measure a wide range of flow rates. Whether you're dealing with water, oil, or other liquids, an ultrasonic flow meter can get the job done. Check out our Ultrasonic Water Flow Meter for a great option for water applications.
Tools and Materials You'll Need
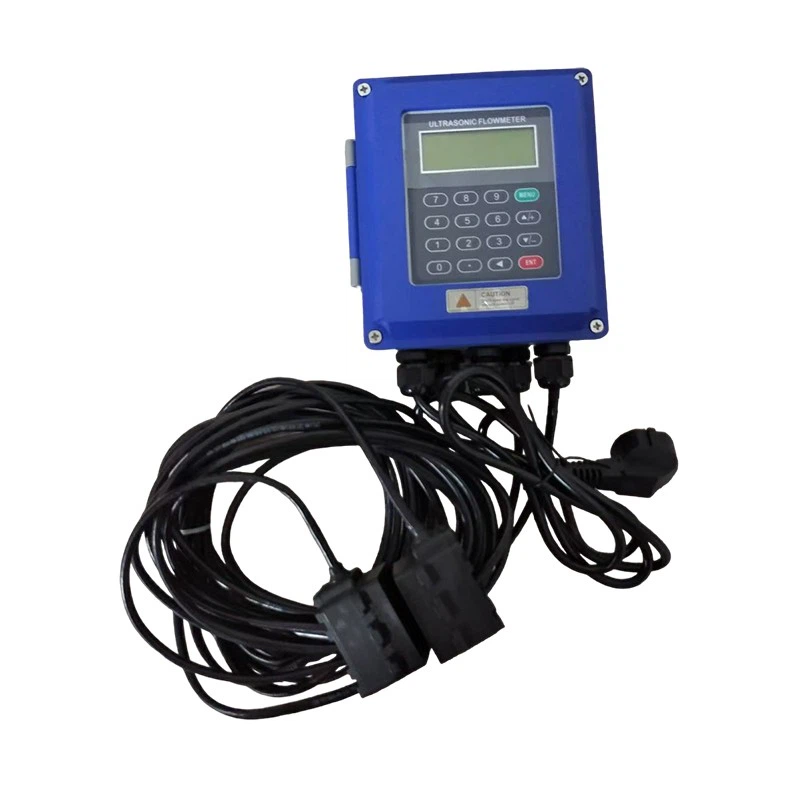
First things first, gather all the necessary tools and materials. You'll need a tape measure to measure the pipe diameter accurately. A pipe cleaner or sandpaper is essential for cleaning the pipe surface where the sensors will be attached. You'll also need a coupling gel. This gel helps to transmit the ultrasonic signals between the sensors and the pipe. And of course, you'll have your ultrasonic flow meter and its sensors. If you're going for a long - term installation, a fixed type might be your best bet. Check out our Fixed Ultrasonic Flow Meter for a reliable option.
Step 1: Select the Right Location
Picking the right location on the metal pipe is crucial. You want to choose a straight section of the pipe. Avoid areas near elbows, valves, or pumps because the flow in these areas is often turbulent, which can affect the accuracy of the flow measurement. A good rule of thumb is to select a section that is at least 10 times the pipe diameter upstream and 5 times the pipe diameter downstream of any disturbances.
Step 2: Measure the Pipe Diameter
Once you've found the right location, measure the pipe diameter. Use your tape measure to get an accurate reading. Make sure to measure the outside diameter of the pipe. This measurement is important because the flow meter installation and calibration are based on the pipe diameter.
Step 3: Clean the Pipe Surface
Cleaning the pipe surface is a must. Use your pipe cleaner or sandpaper to remove any rust, paint, or dirt from the area where the sensors will be placed. A clean surface ensures good contact between the sensors and the pipe, which is essential for proper signal transmission.
Step 4: Determine the Sensor Placement
There are two main types of ultrasonic flow meters: transit - time and Doppler. For transit - time meters, the sensors are usually placed on opposite sides of the pipe. You'll need to calculate the exact placement based on the pipe diameter and the flow meter's instructions. The distance between the sensors is critical for accurate measurement.
For Doppler meters, the sensors are typically placed on the same side of the pipe. The placement still needs to be precise, and you should follow the manufacturer's guidelines carefully. Our Clamp - on Ultrasonic Flow Meter is a popular choice, and it comes with clear instructions on sensor placement.
Step 5: Apply the Coupling Gel
Once you've determined the sensor placement, apply a generous amount of coupling gel to the back of the sensors. The gel fills any small gaps between the sensor and the pipe surface, allowing the ultrasonic signals to pass through easily.
Step 6: Attach the Sensors
Carefully attach the sensors to the pipe according to the placement you've determined. Make sure they are firmly attached and there are no air bubbles under the sensors. You may need to use some pressure to ensure good contact. If you're using a clamp - on type, use the clamps provided to secure the sensors in place.
Step 7: Connect the Sensors to the Flow Meter
After attaching the sensors, connect them to the flow meter using the cables provided. Make sure the connections are secure. Double - check the polarity if applicable to avoid any issues with the signal transmission.

Step 8: Calibrate the Flow Meter
Calibration is the final and very important step. Follow the flow meter's calibration procedure. This usually involves entering the pipe diameter, the type of liquid being measured, and other relevant parameters. The calibration ensures that the flow meter provides accurate readings.
Troubleshooting Tips
If you're having trouble getting accurate readings, there are a few things you can check. First, make sure the sensors are properly attached and there is enough coupling gel. Check the cable connections to ensure they are secure. If the readings are still off, it could be due to a problem with the pipe, such as a blockage or a change in the liquid properties.
Conclusion
Installing an ultrasonic flow meter on a metal pipe isn't as hard as it might seem. By following these steps, you can have your flow meter up and running smoothly. If you have any questions or need further assistance, don't hesitate to reach out. We're here to help you with all your ultrasonic flow meter needs. Whether you're looking for a new flow meter or need advice on installation, we've got you covered. Contact us to start a discussion about your requirements and find the perfect ultrasonic flow meter solution for your application.
References
- "Ultrasonic Flow Meter Handbook" - General reference on ultrasonic flow meter technology and installation.
- Manufacturer's manuals for the specific ultrasonic flow meters mentioned in this blog.